Top Post

Monday, January 27, 2014

Can't beet it!

As a vegetarian for the last fifteen years, an important go-to meal is a good veggie burger.  I have crafted many variations over the years.  I’ve made Maui style burgers with pineapple, Swiss cheese, and tomato; Southwestern with Ortega chili peppers, salsa, and pepper jack cheese; California style with sprouts, avocado and purple onion; German style with sauerkraut and mustard;  Italian style with marinara sauce and mozzarella, even Greek style with roasted red peppers, Mediterranean Tabouli (Tabbouleh) salad, and hummus in a pita.  You name it, if you can put a veggie burger in the mix, I’ve done it!

But a frozen, prepackaged veggie burger was always the common denominator.  Some are better than others, and some are downright nasty (no, I’m not naming names).  Upon closer inspection of the labels most of the top brands contain soy, which is meeting with contention in some nutritional circles now-a-days.  So what if I want to be in charge of exactly what goes into my veggie burger?  I could put in some very healthy and tasty alternatives.  I could also make them blood red, to satisfy that carnivorous urge without breaking my beef fast.  Check out my made from scratch version of a beet burger. 

Mel’s Beet Burgers

(Makes four, serve two and freeze the other two)
(Or double the recipe, serve four and freeze four)

1 onion (1/2 sliced, 1/2 minced)
2 cloves garlic minced
1 tbsp butter
1 tbsp cider vinegar
1 can black beans and 1/4 cup raisins (processed until rough chop in food processor)
1/8 cup oat bran
1/4 cup cooked brown rice
2 roasted and peeled beets
1 tsp Dijon mustard
1 tsp cumin
salt and pepper to taste
romaine lettuce
1 avocado  (1/2 mashed for each burger)
buns or grilled bread
(optional) smoked blue cheese

Melt butter in a large pan and cook the minced and sliced onions side by side.  Cook until brown, add garlic to minced onions.  Remove sliced onions and set aside. Deglaze pan with cider vinegar and remove onion mixture to bowl. Mix the bean mixture with the sautéed minced onions and garlic in a bowl.  Grate in the roasted peeled beets.  Stir in the bran, rice, mustard, and spices.  Form into patties and freeze for fifteen minutes or refrigerate for one hour.  (If you are freezing some for future use, this is the stage at which to do so, I freeze them in glass freezer safe containers with parchment paper separating the layers).

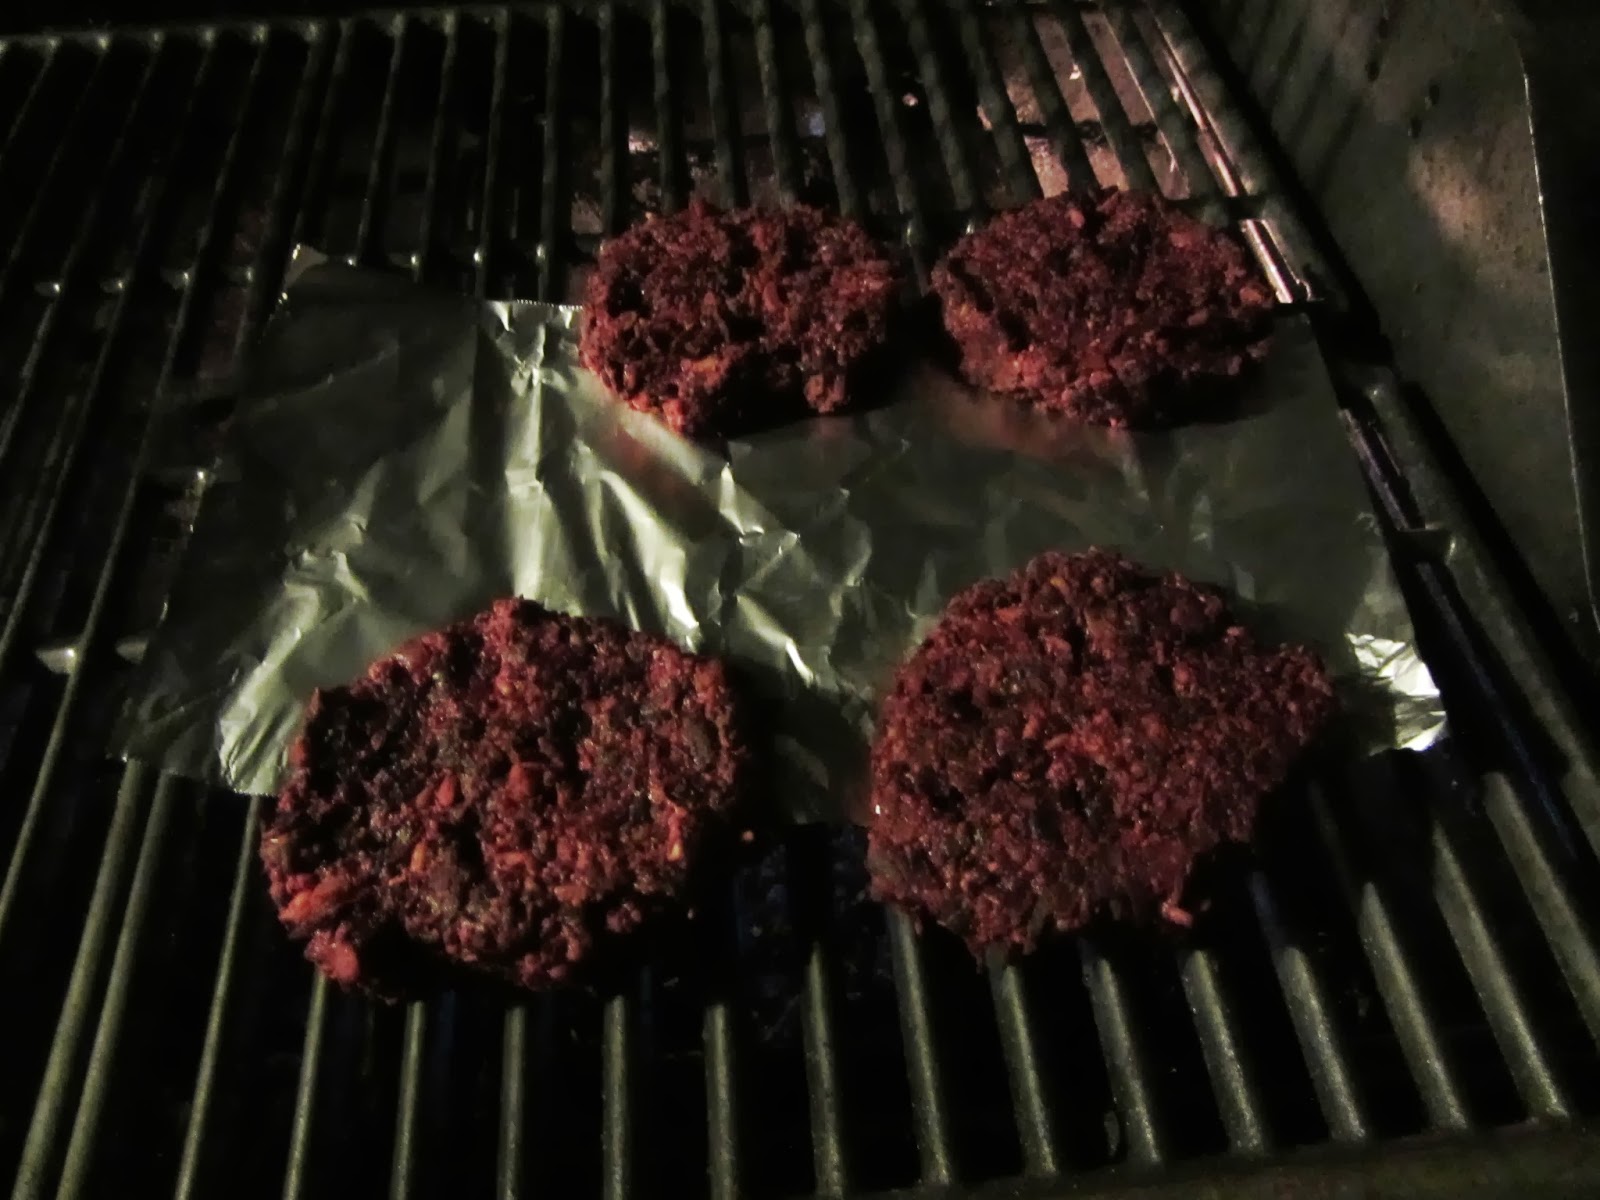
Spray patties with non-stick spray (coconut oil).  If grilling patties, keep them more than halfway on top of tin foil to help them not stick or fall apart, but they hold together better in a hot oiled skillet.  Melt blue cheese on top, assemble with lettuce, avocado, and grilled onions on toasted buns or grilled bread. (No gluten for you? Serve on a plate with a butter lettuce salad tossed in a lemon vinaigrette).


Roasted and peeled beets, 
then grated and mixed into a bowl with the binding ingredients
 Prepared pattys,
and all the fixings.


Freezer storage.                  Grilling atop tin foil.
Final presentation!


Sunday, January 12, 2014

Keeper of the Culture


When it comes to cultures, I’m a bit of a fanatic.  It all started with cheese.  For our sixth wedding anniversary my husband enrolled me in a class at the Institute for Domestic Technology in Alta Dena, CA.  The site of the class was a small but fully functioning Goat Dairy.  This was heaven on earth for a cheese enthusiast like myself.  Not only did we learn how to make goat cheese in this class, but there were lessons on DIY bread, jam, and mustard.  

Once I knew the basics of making a soft goat cheese, I stated to wonder, “What other kinds of cheese can I make?”  I’ve tried out mozzarella, ricotta, and cottage cheese so far, all with varying degrees of success.  (More on that in an up and coming cheese post).

Then I moved on to yogurt.  I’ve mentioned how we became spoiled during our travels in Switzerland with freshly made yogurt each morning.  So when we returned home, I had to figure out the intricacies of yogurt making.  I got really good at making a 24-hour recipe, but when I decided to make the jump to raw milk the texture of the yogurt changed and was not my personal favorite.  That’s when my husband asked if I could make kefir.  He had recently become a fan of this yogurt like drink.  I didn’t know much about it, so I started my research.

It turns out that kefir is basically fermented milk.  I know that sounds dubious to a novice.  My husband who loved drinking it for months became very suspicious when I embarked on making our own.  “Explain to me again how fermented milk is different from rotten milk?,” he would ask as I set another batch out on the counter to culture. 

Here’s how it works... To make kefir, you pour milk over milk proteins (called kefir grains, though they are not grains, just shaped like them.  Some say they resemble cauliflower; to me they look like cottage cheese).  Living upon the grains are healthy yeasts and bacteria, similar to the type we are told to look for in our yogurt.  These live cultures infuse the milk with life.   Whole milk works best and is actually healthier for you than lowfat or nonfat milks (we can get into that another time.)  I also prefer to use raw milk because it is not pasteurized, allowing the beneficial bacteria already in the milk to live and I want our kefir to have as many good gut bugs as possible!  (I know that raw milk is a concern for some, but I have discovered a trusted local dairy who produces it, and for our family the benefits outweigh the risks). 

After about 24 hours at room temperature, you strain off the liquid and keep it in the fridge, that’s the kefir.  Then you put your grains in a clean jar, cover them with more milk and start again.  (I use a rubber band and a coffee filter to keep debris out of the jar while culturing). 

Kefir is supposedly pronounced “kuh-fear”. I’m pretty sure there could be an international debate over how to correctly say this word.  Most people around here seem to know what I’m talking about if I pronounce it like “Keifer Southerland” the actor.

Why drink kefir?  Well, the culturing process makes the lactose more easily digestible so it is gentle on your stomach first thing in the morning.  Those probiotics keep your gut health in balance.  Some say that kefir has an acquired taste and I agree, but it is worth acquiring it.  Kefir has taken the place of all store bought yogurt in our home.  It is a no sugar added option but if you desire sweetness you can add a little honey and fruit and make it into a smoothie.  I also strain it through a coffee filter to get a thicker Greek yogurt like texture and make dips or sauces from it.  If I have extra, I’ll use it to make muffins or bread.  The possibilities are inspiring.

I have shared my grains with three adventurous friends thus far and eagerly await reports on how it’s growing.  As the grains grow, you will have extra to give away if you decide to give this process a go.  I have dubbed myself the keeper of the culture because I cannot seem to stop myself when it comes to this culinary category.


Saturday, January 11, 2014

Pandora’s Box


 (...or in this case, Pandora's Jar)


This has become a common dialog in our kitchen.
Me: “You know what I think I have to do…”
The husband: “Oh no...”
Me: “Yep, I’m gonna have to start making this from scratch,” (as I read the ingredients)
The husband: “Sigh,” (as he thinks about the mess I’m about to make and that he will no doubt end up cleaning up.)

Did I mention that my husband is the greatest?  He truly is supportive of all of my crazy kitchen endeavors.  He willingly tries out my experiments and cleans up after me.  What more could a girl ask for?  Did I also happen to mention he is my editor?

The most recent realization was that we have been eating a lot of peanut butter.  I’ve been craving protein as I increase my running distance and apples with peanut butter are an easy go-to snack.  I just had to take a closer look at our favorite childhood peanut butter that has been a staple in our pantry for time out of mind. (I won’t mention the brand, as I promised myself not to brand bash in this blog, it’s not good karma.  I will only mention a brand if I think it is absolutely wonderful and my endorsement might help their bottom-line because my following has grown so immense.  Hey, a girl can dream! Can’t she?) Back to my favorite childhood jar of peanut butter; there it was, just after peanuts and sugar, (as I feared) the third ingredient printed on the label was the dreaded “hydrogenated vegetable oil.” With all of the nutritional reading I’ve been doing lately, I knew that it was not a good thing. While this type of oil is most likely employed for it’s preservative qualities, we don’t need our peanut butter to be shelf stable for a year plus, we are going to eat it much more quickly than that. So what would I need to mix up a healthier alternative?  Roasted peanuts, a little sea salt, and something to give it the proper texture, coconut oil!  What the heck, I’ll give it a whirl. 

There was a little pout and a fake sniff from the husband, he was not too keen on losing a childhood favorite either.  But he is learning that I’m not going to take a beloved part of our diet away, unless I can replace it with something better, not only better in terms of health but possibly also in terms of taste.  So he stood guard over the food processor skeptically, as the peanuts began to spin around. 

First they turned into a fine crumb mixture and then we worried that the blade was no longer making contact, so I stopped the machine and scrapped the edges of the bowl with a spatula.  When the spinning commenced, something started to take shape, a rough mound began to form and gradually became a misshapen ball. 

As the minutes passed, the dough like mixture surrendered back to the bottom of the bowl and formed a sputtering paste.  I tasted it...  peanuty.  It needed a little salt, but not much and about two heaping tablespoons of coconut oil to help the liquidy texture come together.  It thickened a bit.  We tasted it again, victory!  I poured the contents into two Weck jars and stuck them in the fridge.  

A follow up to the afore mentioned brand name bash declaration, Weck jars are super awesome glass jars with plastic lids that pop on and off.  They have glass lids and clamps for canning, but I use the convenient plastic lids for fridge storage.  We first encountered this brand of jars in Switzerland.  Our hotel served housemade yogurt in them every morning.  I fell instantly in love with the yogurt, the jars, the Swiss, you name it!  Anyhow, Weck jars will be referred to often, always in a positive light.  (I am not paid to promote this brand, but if anyone from Weck is listening, I could be persuaded.)

Here is the down and dirty recipe for Pandora’s Peanut Butter

Ingredients:

16 oz dry roasted unsalted peanuts
½ tsp sea salt (or to taste)
2 heaping tbsp coconut oil

Place peanuts in the food processor and use a large blade.  Start up the processor and once the nuts resemble fine crumbs stop grinding for a moment, scrape the sides of the bowl with a rubber spatula and continue.  The nuts will form a ball, then dissolve into a liquid-like paste.  Stop the machine again and taste, add salt (if desired), then add the coconut oil).  Blend again for another minute.  Pour it in jars, with the help of your rubber spatula.

This mixture would last for a couple of weeks when kept in the pantry but since the consistency was a little on the thin side, I am going to keep it in the fridge.  That way it will last a month or two, though I highly expect we will have eaten it all by then.  

Sunday, January 5, 2014

Pantry Epiphany


The concept is a simple one.  You are what you eat.  So if that is true, most Americans would be processed, fast food, GMO mutations who lack any true sense of where our food really comes from.   While our minds may know better, our bodies suffer the harsh reality. 

As a teacher of young children for more than fifteen years, I have seen the alarming array of processed foods that our youth (and society at large) consume on a daily basis.  The bright orange Cheetos stained fingers that often smudge papers after the breakfast hour, used to shock me.  The intoxicating smell of French fries, as the ‘lucky’ kid’s mom drops off a bag of McDonalds for lunch, unnerves me. And the abundance of lollypops and candy bars that have to be devoured before reentering the classroom because they served as someone’s recess snack, concern me as I think about the relationship my students are forming with food.  As my students and I have grown gardens together over the years, I am amazed at how little they know about where real food comes from.

My journey toward healthy eating was reignited in my early twenties as I began a yoga practice. (I say reignited because my mom will argue, she started me off on the right foot by hand grinding all of my baby food, but like all the other kids raised in a fast food nation, somewhere I went astray).  My friend, and soon to become boyfriend (then eventually to become husband) was beginning to take yoga classes at the time.  After some research, he suggested vegetarianism.  At first I resisted, but the more I read the more I knew my conscience would win out. 

At first, our vegetarian lifestyle was what limited our fast food intake.  There are few appetizing choices for vegetarians in most fast food establishments.  Over time, the more I cooked and tried new recipes, the more I realized that the fresher my ingredients were, the better the dish would be.  This encouraged me to seek out the freshest produce, a journey that led me to visit the local farmer’s market religiously. (I literally go every Sunday; better attendance than some can claim at church). Eventually this sojourn landed me to my own backyard.  Certainly the ultimate way to get the freshest vegetables was to grow them myself.  This pipe dream pushed my husband and I to build ten raised beds in our tiny backyard. When our desire to grow more exceeded the capabilities of our small back lot, we redesigned our front yard into attractive and functional vegetable plots as well.

Through travel, my husband and I had the opportunity to experience farms in Tuscany and experience the slow food culture of Europe. We became ‘flexitarian’ for a time, when the meat offered at farms was so fresh and we had a personal relationship with the farmer, we had less objections.  While we have found a trusted fish monger in our home town, we’ve yet to feel the confidence in pork that we found in Italy.  While our horizons were broadened by our travels, my husband and I brought home many expectations in terms of the quality of our food.

While the quality of our produce had increased tenfold due to home grown or farmer’s market purchased wares, I started looking at my other ingredients with a skeptical eye.  How much sugar was in my breakfast cereal and what about preservatives? I can’t even pronounce half of them let alone tell you what they are.  I like to know where my vegetables come from, so why not my grains, my milk, and so forth.  I dabbled in growing my own grains and realized that on less than a quarter of an acre, growing my own grain and milling it was not going to be something I could manage along with a full time teaching job.  But making my own breakfast cereal so that I could control the ingredients and eliminate the preservatives, I could give that a go.  As with many of the other processes we have reclaimed, there was a learning curve.  But once a working recipe and routine is established it becomes a manageable part of our lifestyle.

So that is where this title “Pantry Epiphany” came from. It is the gradual realization that the more control I could reclaim over my nourishment, the healthier and happier I would become.  Each new crop I grow, or processed product in the pantry I replace with something homemade, or quality local food I discover helps me grow as well.  We have been taught, “You can only buy that in a store. You can’t make that.  You don’t have the time, the skill, the knowledge.”  Each time I disprove one of these falsehoods, I feel empowered. 

As a professional educator, it seems natural to share these triumphs with others who wish to learn how to take back their plate and in turn take back their fate.  In the same spirit that I strive to create an inclusive classroom, this blog is not just for vegetarians or real food enthusiasts. I hope to have readers who are looking for just one manageable change they can make toward a less processed diet, as well as others who are already rocking out this lifestyle and can teach me a thing or two.  Any classroom teacher will tell you that their students teach them something everyday.  I hope the same will be true of our interactions here.  I want this to be a safe place, where we can learn and grow together.  I don’t claim to know it all, I just want to write about my journey and I invite you to come along for the ride.